Akua-Intaglio
Instructions
Table of Contents
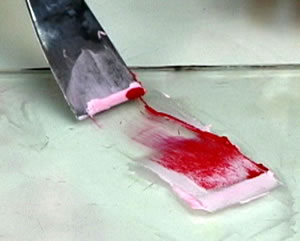
Ink
Consistency.
|

|
|
Akua Oil
Converter
Photos from SAFERPRINTMAKING video
|
|
|
|
|
Akua Oil
Converter
Photos from SAFERPRINTMAKING video
|
|
|
Akua
Intaglio is different from traditional inks in that it has a
buttery or liquid consistency. Separation also occurs,
therefore mixing is necessary before using. Place the ink
knife directly in the ink container and stir. Mix well from
the bottom of the container to the top. Akua Intaglio will
never harden or form a skin in the container or when left
uncovered. The ink consistency varies depending upon the
pigment and temperature conditions. Ink will be stiffer when
cold and looser when warm.
When trying Akua Intaglio for the first time, we recommend
using it right from the jar without modification. However,
if a stiffer consistency is desired, it is best to use the
Oil Converter.
Before mixing, work the Oil Converter with the ink knife
till it’s smooth. Then add Akua Intaglio Ink into the
Oil Converter. Start with small amounts until the desired
thickness is achieved. To Loosen ink, work ink with an ink
knife under a warm lamp, hair dryer, or a hot plate set a
very low temperature.
|
Mixing
colours
Create new colors
by mixing Akua Intaglio inks with one another using an ink knife, or
by adding Akua Kolor into Akua Intaglio. Akua Kolor is so highly
concentrated that a few drops added to the same Akua Intaglio color
will enrich it. Note: Akua Intaglio will temporarily thicken when
Akua Kolor is added to it.
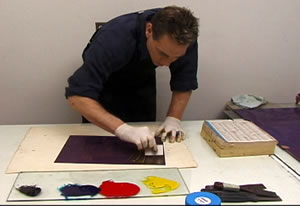
Inking
the plate
|
Use a piece of cardboard as
a spatula to apply the ink to the plate. Use the card to
press the ink into the grooves. A small roll of blanket
(like "a la poupée) can be used for bigger plates.
Use a spatula to remove the excess ink. Use telephone
directory paper to wipe the plate with the palm of your
hands.
|
|
|
|
David Jay Reed
applies ink with a piece of cardboard
Photos from SAFERPRINTMAKING video
|
|
Wiping
the plate
Akua Intaglio is very soft ink.
It applies and wipes off the plate much easier and quicker than
oil-based inks. Therefore, at first there may be a tendency to remove
too much ink. For best results, use cheesecloth, or very soft
tarlatan to wipe the surface of the plate. Roll the cheesecloth or
soft tarlatan into a large ball shape. Follow through with a paper
wipe if necessary. Be careful not to press your fingers into the
inked surface of the plate. Since the ink is soft, it will transfer
fingerprint impressions easily.
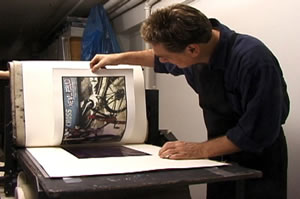
Printing
on Paper
|
|
|
|
David Jay Reed
printing a four colour intaglio print
Photos from SAFERPRINTMAKING video
|
|
|

|
|
Four Colour
Intaglio-type print by David Jay Reed
|
|
Akua Intaglio
ink prints well on most standard printmaking papers. We suggest
conducting a test by printing the same plate twice. Make one print on
dry paper and another print on dampened paper. Your results may
depend upon individual plate characteristics and the type of paper
used.
Printing on dry paper offers higher contrast prints. It also
eliminates the possibility of paper shrinkage making it ideal for
printing multi-registered plates or combining prints with digital ink
jet or letterpress images. Increase the press pressure and use soft
printmaking papers when printing on dry paper. If the print results
are blotchy or inconsistent it may be necessary to dampen the
paper.
Printing on damp paper may offer greater tonal values and more
consistent print results for aquatints. Soak the paper for 30 seconds
and blot thoroughly before using.
Re-Soaking
Prints
Akua Intaglio ink is permanent.
If necessary, prints may be placed in a tray of water immediately
after printing. Do not soak prints too long and be careful not to
touch the image while wet.
Print
Drying Times
Akua Intaglio ink does not
contain dryers. Typically a shallow bitten plate will take 24 hours
to dry. Deeply bitten plates may take 2 weeks or longer. Drying time
may also depend upon paper absorbency, climate, and the amount of ink
applied. Glossy or coated papers are not reliable. Try to avoid using
cobalt- or manganese dryers.
Cleaning
Up
First, clean all inky surfaces,
rollers, and plates with a dry rag. Use 1 part liquid dish detergent
to 20 parts water for cleaning up any remaining ink residue. Use a
little vinegar diluted with water to clean any soap build up if
necessary.
Trouble
Shooting
Ink dries too
light on the print
- Stir the ink
thorougly in jar before using
- Try different papers
- If using Carbon
Black, try Lamp Black
- Paper may be too wet (blot before
using)
- Plate may be over
wiped (apply ink with a rubber squeegee or wipe with less
hand-pressure, softer tarlatan, or just paper wipe)
- Add Akua Kolor to
the ink to enrich
Ink dries too dark
on the print
- Add Transparent Base to
the ink to reduce the color intensity.
|
|

|
|
Transparent
Base
Photos from SAFERPRINTMAKING video
|
|
Print dries too
matte
- Add Akua Oil Converter to the ink
Etched lines bleed on finished
print
- Paper may be too wet (blot before
using)
- Try different papers
- Add Akua Oil Converter to the ink
Heavy inked prints dry
slowly
- Toxic Cobalt and Manganese dryers
are not recommended , but can be used.
- Dry de prints in a well
ventilated area.
- Avoid a humid
environment
- Give the print the time to
dry.
Ink wipes out from incised
lines
- Ink may be too loose (stiffen the
ink with Akua Oil Converter)
Print lacks plate
tone
- Loosen the ink by warming with
hair dyer or hot plate.
- Print on damp paper
Print has too much plate
tone
- Stiffen the ink with Akua Oil
Converter
- Print on dry paper
- Wipe more thoroughly with paper
Prints dry blotchy
- Dampen the paper
- Avoid touching the inked surface
of the plate and transferring fingerprints
Use the "back button" to go
to the previous page